Grab your Contraction Matching {HERE}.
14 Days of Freebies - Day 13
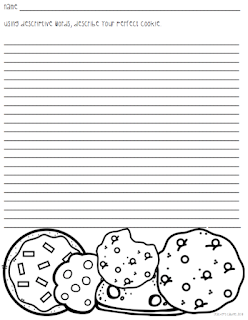
Grab this writing freebie {HERE}. I love making writing meaningful to students and sometimes that means making it more like a quick write. I understand the importance of writing to a text and all of that, but we also need to let students know that while writing helps us learn, it can still be done for pleasure. This freebie lets students describe their perfect cookie. I love reading these because students get really creative with what they would make. I have included lines for younger kids and lines for older kids.
14 Days of Freebies - Day 12
This freebie is part of my Get Organized Series. This is just being released today. You can grab it {HERE}. Need more ways to stay organized? Check out my store!
14 Days of Freebies - Day 8
I love doing crafts in my classroom to motivate my students. I typically do crafts that relate to our writing. Writing can be a struggle for a lot of students. When there is a craft involved, students love it. See how I have used craft related writing {HERE} and {HERE}.
This craft comes with the patterns needed for one butterfly. If you have older students, you can provide these patterns on cardstock and have them trace it onto construction paper (their choice of color), and glue the pieces together (layering the wings).
Grab this butterfly craft {HERE}.
Multiplication Mystery Pictures

Ok blogger friends! I have to share this great resource that I found on TPT. It is called February Multiplication Mystery Pictures by Teaching in The 208. We needed some extra multiplication fact practice, and flashcards are boring, but who doesn't love coloring!? So that is exactly what we did.
Basically, you give students these grids with multiplication facts on them and the students have to solve the facts and color according to the code. There are three different levels for each mystery picture. So you can differentiate the multiplication facts! Since my third graders are expected to know their facts all the way through the 12s, we did the higher level one. My kiddos that needed help, used manipulatives to solve the higher math facts.
I made my students write the products in the boxes before they could color, so I knew they were actually solving and not guessing.
Look at all the fact practice! In fact, there are 225 facts on a page. So, it did take my students some time to finish it, but they had fun doing it. The pack includes 5 different pictures with three levels each, so you are really getting 15 pages of multiplication facts! Totally worth it in my opinion. I have already printed another one that I am going to put in for a center one week. We did this one today because I wanted them to have it done in time for Valentine's Day so we could hang them up.
Can you figure out what it says? You can grab this fun {HERE}. If you like the February pack, she has other months available as well!
Time to Teach
We have started our unit on time! I love that we teach time after we teach fractions. Now that my students understand number lines, they transitioned into time fairly easily.
We started with a few videos and then built our anchor chart. Of course, most of the basics, my kids remembered from last year.
Look at them building the time on the clock!
You can find this worksheet and other time worksheets {HERE}.
Task Cards
We love task cards in my classroom! We use them for many different things, but many people struggle to organize them. Honestly, it is all about preference. I started by putting my task cards on binder rings. This worked great until I had to store them and I started to have many cards.

On the back of my file folder, I put the recording sheet. There are a few reasons I did this. First, I will always have a master recording sheet, ready to copy more. Second, I laminate my folders. So now a student can use this with a dry erase marker, if I am working with them one-on-one, or they are working independently.
This is what it looks like when I put it in the center. Super easy for me. All my task cards follow this format, so the kids know what to do even when I change the skill.
Then I tried something like these. I had found some that were single compartments and about the size of an index card. I really like these as well. There were easy to store as well.
This year, I have really stayed on top of my centers and I am working really hard to organize my centers. I want to be able to pull my centers and go. So here is where I am now.
This is what it looks like in my center. The students grab a recording sheet and that is what they turn in to me for accountability. Instead of spending time cutting and sorting all the task cards, I print them and laminate them. Then I put them in a file folder for storage.
On the front of my file folder, I glued on the title page, so that when I pull it out, I know exactly what I am pulling out.
This is what it looks like when I put it in the center. Super easy for me. All my task cards follow this format, so the kids know what to do even when I change the skill.
You can find some of my task cards at my TPT store. The ones in the pictures are being uploaded as we speak.
Subscribe to:
Comments (Atom)


